- Spring websocket chatting server(1) – basic websocket server
- Spring websocket chatting server(2) – Stomp로 채팅서버 고도화하기
- Spring websocket chatting server(3) – 여러대의 채팅서버간에 메시지 공유하기 by Redis pub/sub
- Spring websocket chatting server(4) – SpringSecurity + Jwt를 적용하여 보안강화하기
- Spring websocket chatting server(5) – 채팅방 입장/퇴장 이벤트 처리, 인원수 표시
- Spring websocket chatting server(6) – Nginx+Certbot 무료 SSL인증서로 WSS(Websocket Secure) 구축하기
이번 장에서는 지금까지 만든 웹소켓 채팅 서버를 실제 서버에 올려보고 SSL을 적용하는 실습을 진행해보겠습니다. 실습 내용은 다음과 같습니다.
- 서버에서 Executable Jar로 Websocket 채팅서버를 실행
- CertBot을 설치하여 무료 SSL 인증서 발급
- Nginx의 ReverseProxy를 이용한 WSS( WebsocketSecure ) 구축
실습 환경
- Instance – AWS Freetier EC2
- OS – Amazone Linux AMI(CentOs)
- Java – jdk8 ~ jdk11
필요 요구 사항
이번 실습은 실제 도메인을 필요로 합니다. 필자는 godaddy(https://kr.godaddy.com/)에서 daddyprogrammer.org 도메인을 이미 구매하여 사용하고 있는 상태이므로 서브도메인 chat.daddyprogrammer.org을 생성하여 실습하겠습니다.
Godaddy DNS설정에서 채팅 서브 도메인을 추가로 설정하였습니다. 적용에는 시간이 필요하므로 시간이 좀 흐른 후에 해당 도메인으로 접속이 되는지 확인합니다.

서버에서 Executable Jar로 Websocket 채팅서버를 실행
git 설치
$ sudo yum install git
채팅 프로젝트 clone
$ mkdir chat
$ cd chat
$ git clone https://github.com/codej99/websocket-chat-server.git
$ ls
websocket-chat-server
빌드 & Executable Jar 생성
$ cd websocket-chat-server
$ ./gradlew bootJar
BUILD SUCCESSFUL in 13s
3 actionable tasks: 3 up-to-date
$ cd build/libs/
$ ls
chat-0.0.1-SNAPSHOT.jar
채팅 서버 실행
필자는 자체 구축한 redis서버가 있어 3번째 방법으로 서버를 실행하였습니다.
// 내장 redis로 띄우는 경우
$ java -jar chat-0.0.1-SNAPSHOT.jar
// 포트를 기본 8080이 아닌 다른 포트로 띄우고 싶은경우
$ java -jar -Dserver.port=8100 chat-0.0.1-SNAPSHOT.jar
// redis를 자체 구축하고 application-alpha.yml에 redis 접속정보를 설정한경우
$ java -jar -Dspring.profiles.active=alpha chat-0.0.1-SNAPSHOT.jar
CertBot을 설치하여 무료 SSL 인증서 발급
CertBot 프로그램을 이용하면 Let’s Encrypt에서 무료로 SSL 인증서를 발급 받을 수 있습니다.
Certbot 설치
$ sudo yum install certbot
인증서 발급
$ sudo certbot certonly –standalone -m 이메일주소 -d 인증서 적용할 도메인
$ sudo certbot certonly --standalone -m happydaddy@naver.com -d chat.daddyprogrammer.org
Saving debug log to /var/log/letsencrypt/letsencrypt.log
Plugins selected: Authenticator standalone, Installer None

- - - - - - - - - - - - - - - - - - - - - - - - - - - - - - - - - - - - - - - -
Please read the Terms of Service at
https://letsencrypt.org/documents/LE-SA-v1.2-November-15-2017.pdf. You must
agree in order to register with the ACME server at
https://acme-v02.api.letsencrypt.org/directory
- - - - - - - - - - - - - - - - - - - - - - - - - - - - - - - - - - - - - - - -
(A)gree/(C)ancel: A 입력후 엔터

- - - - - - - - - - - - - - - - - - - - - - - - - - - - - - - - - - - - - - - -
Would you be willing to share your email address with the Electronic Frontier
Foundation, a founding partner of the Let's Encrypt project and the non-profit
organization that develops Certbot? We'd like to send you email about our work
encrypting the web, EFF news, campaigns, and ways to support digital freedom.
- - - - - - - - - - - - - - - - - - - - - - - - - - - - - - - - - - - - - - - -
(Y)es/(N)o: Y 입력 후 엔터
Obtaining a new certificate
Performing the following challenges:
http-01 challenge for chat.daddyprogrammer.org
Waiting for verification...
Cleaning up challenges

IMPORTANT NOTES:
- Congratulations! Your certificate and chain have been saved at:
   /etc/letsencrypt/live/chat.daddyprogrammer.org/fullchain.pem
   Your key file has been saved at:
   /etc/letsencrypt/live/chat.daddyprogrammer.org/privkey.pem
   Your cert will expire on 2019-09-18. To obtain a new or tweaked
   version of this certificate in the future, simply run certbot
   again. To non-interactively renew *all* of your certificates, run
   "certbot renew"
- Your account credentials have been saved in your Certbot
   configuration directory at /etc/letsencrypt. You should make a
   secure backup of this folder now. This configuration directory will
   also contain certificates and private keys obtained by Certbot so
   making regular backups of this folder is ideal.
- If you like Certbot, please consider supporting our work by:

   Donating to ISRG / Let's Encrypt:   https://letsencrypt.org/donate
   Donating to EFF:                    https://eff.org/donate-le


Saving debug log to /var/log/letsencrypt/letsencrypt.log
Plugins selected: Authenticator standalone, Installer None

- - - - - - - - - - - - - - - - - - - - - - - - - - - - - - - - - - - - - - - -
Please read the Terms of Service at
https://letsencrypt.org/documents/LE-SA-v1.2-November-15-2017.pdf. You must
agree in order to register with the ACME server at
https://acme-v02.api.letsencrypt.org/directory
- - - - - - - - - - - - - - - - - - - - - - - - - - - - - - - - - - - - - - - -
(A)gree/(C)ancel: A

- - - - - - - - - - - - - - - - - - - - - - - - - - - - - - - - - - - - - - - -
Would you be willing to share your email address with the Electronic Frontier
Foundation, a founding partner of the Let's Encrypt project and the non-profit
organization that develops Certbot? We'd like to send you email about our work
encrypting the web, EFF news, campaigns, and ways to support digital freedom.
- - - - - - - - - - - - - - - - - - - - - - - - - - - - - - - - - - - - - - - -
(Y)es/(N)o: Y
Obtaining a new certificate
Performing the following challenges:
http-01 challenge for chat.daddyprogrammer.org
Waiting for verification...
Cleaning up challenges

IMPORTANT NOTES:
- Congratulations! Your certificate and chain have been saved at:
   /etc/letsencrypt/live/chat.daddyprogrammer.org/fullchain.pem
   Your key file has been saved at:
   /etc/letsencrypt/live/chat.daddyprogrammer.org/privkey.pem
   Your cert will expire on 2019-09-18. To obtain a new or tweaked
   version of this certificate in the future, simply run certbot
   again. To non-interactively renew *all* of your certificates, run
   "certbot renew"
- Your account credentials have been saved in your Certbot
   configuration directory at /etc/letsencrypt. You should make a
   secure backup of this folder now. This configuration directory will
   also contain certificates and private keys obtained by Certbot so
   making regular backups of this folder is ideal.
- If you like Certbot, please consider supporting our work by:

   Donating to ISRG / Let's Encrypt:   https://letsencrypt.org/donate
   Donating to EFF:                    https://eff.org/donate-le
발급받은 인증서 확인
생성 위치 : /etc/letsencrypt/live/도메인명/
$ sudo ls /etc/letsencrypt/live/chat.daddyprogrammer.org/
README	cert.pem  chain.pem  fullchain.pem  privkey.pem
Nginx의 ReverseProxy를 이용한 WSS( WebsocketSecure ) 구축
이제 위에서 생성한 도메인과 SSL인증서를 바탕으로 WSS ReverseProxy 서버를 구축해보겠습니다.
nginx 설치
다음 링크의 내용을 참고하여 nginx를 설치합니다.
http://www.daddyprogrammer.org/post/2348/aws-ec2-install-nginx-mariadb/
nginx ReverseProxy 및 SSL+ Websocket 설정 추가
nginx.conf 파일을 열어 ReverseProxy 및 SSL+ Websocket 설정을 추가합니다.
http 설정 하위에 두개의 server{} server{} 구문으로 이루어져 있으며 첫번째 server구문 안에는 http(80)으로 요청이 들어올때의 설정입니다. https를 이용할 것이므로 http로 들어와도 return 301 ~~ 구문을 이용하여 https 주소로 리다이렉트 되도록 합니다.
두번째 server구문 안에는 https(443)으로 들어올때의 설정이 담겨 있습니다. server_name에는 도메인 주소를 적습니다. ssl_certificate에는 위에서 발급받은 무료 도메인 인증서의 위치를 설정합니다.
location / 안에서는 실제로 요청을 어떻게 처리할지 내용을 적습니다. nginx는 reverse_proxy서버의 역할을 해야하므로 관련 내용을 적습니다. proxy_pass http://localhost:8080; 설정의 경우 websocket 서버를 8080이 아닌 다른 포트로 띄운경우 수정해야 합니다. Websocket의 경우 http 프로토콜로 접속한 후에 Websocket 프로토콜로 Upgrade하는 과정을 거치는데 해당 내용을 처리하기 위해 nginx에 설정을 추가해줍니다.
http {
    // 생략 ..........

    server {
        listen       80 default_server;
        listen       [::]:80 default_server;
        server_name  chat.daddyprogrammer.org;
        root         /usr/share/nginx/html;

        location / {
                 return 301 https://chat.daddyprogrammer.org$request_uri;
        }
    }

    server {
        listen 443 ssl;
        server_name chat.daddyprogrammer.org;

        ssl_certificate /etc/letsencrypt/live/chat.daddyprogrammer.org/fullchain.pem;
        ssl_certificate_key /etc/letsencrypt/live/chat.daddyprogrammer.org/privkey.pem;

        location / {
                proxy_set_header    HOST $http_host;
                proxy_set_header    X-Real-IP $remote_addr;
                proxy_set_header    X-Forwarded-For $proxy_add_x_forwarded_for;
                proxy_set_header    X-Forwarded-Proto $scheme;
                proxy_set_header    X-NginX-Proxy true;
                proxy_pass http://localhost:8080; // 요청을 웹소켓 서버로 전달. 위에서 websocket서버를 8080이 아닌 다른 포트로 띄운경우 수정합니다.
                proxy_redirect  off;
                charset utf-8;

                # WebSocket support
                proxy_http_version 1.1;
                proxy_set_header Upgrade $http_upgrade;
                proxy_set_header Connection "upgrade";
        }
    }
    // 생략 ..........
}
설정이 모두 끝났습니다. nginx를 띄우고 서버를 테스트 해보겠습니다.
// nginx.conf 설정파일 문법 오류 검사
$ sudo nginx -t
nginx: configuration file /etc/nginx/nginx.conf test is successful
$ sudo service nginx start
EC2 Security Group Inbound port 설정
AWS를 이용한다면 기본적으로 EC2 서버의 외부 접근이 막혀있으므로, 접속을 허용하기 위해 Inbound 80, 443 port를 개방해 두어야 합니다.
테스트
http://chat.daddyprogrammer.org를 접속합니다. 자동으로 https로 리다이렉트 됨을 확인할 수 있습니다.
인증서를 확인해보면 Let’s Encrypt에서 발급받은 인증서 내용을 확인 할 수 있습니다.
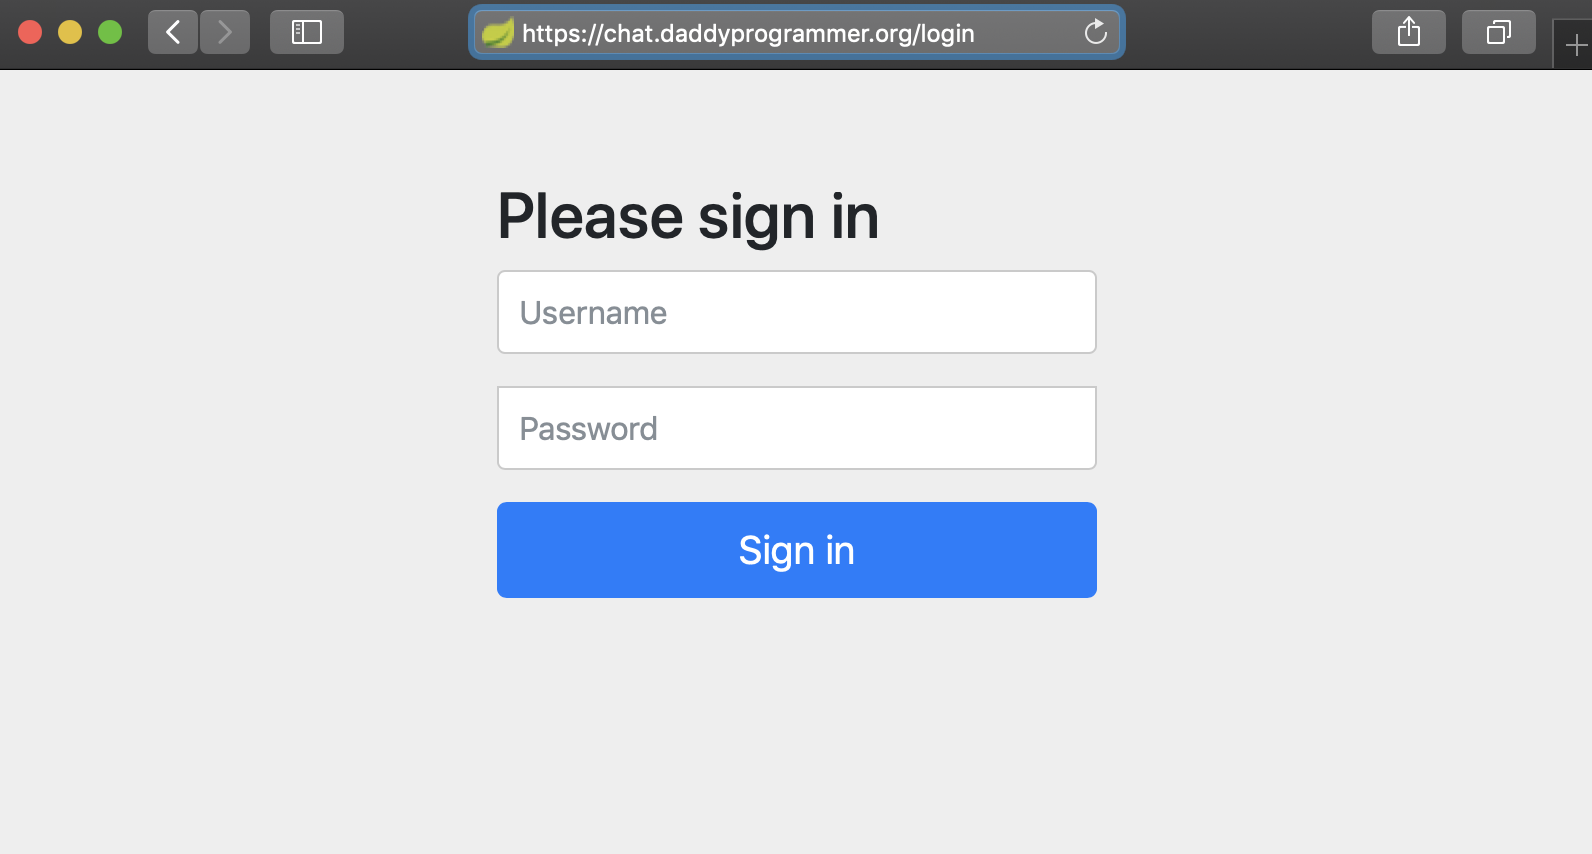
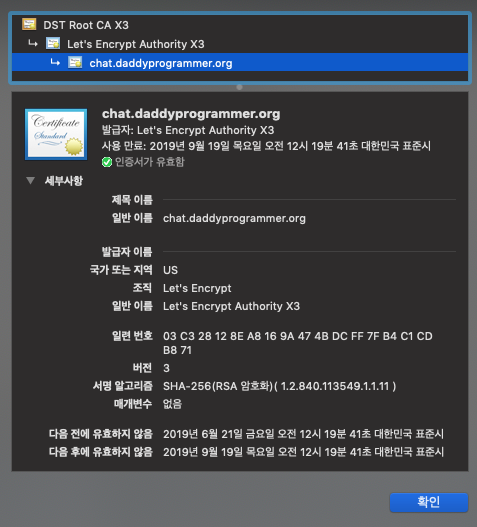
로그인 후 채팅 테스트를 해봅니다. 아래 이미지는 휴대폰을 통해 채팅을 진행한 화면입니다. 반대편에서는 웹브라우저를 통해 접속하여 채팅을 진행하였습니다. 문제없이 채팅이 진행되는것을 확인할 수 있습니다.
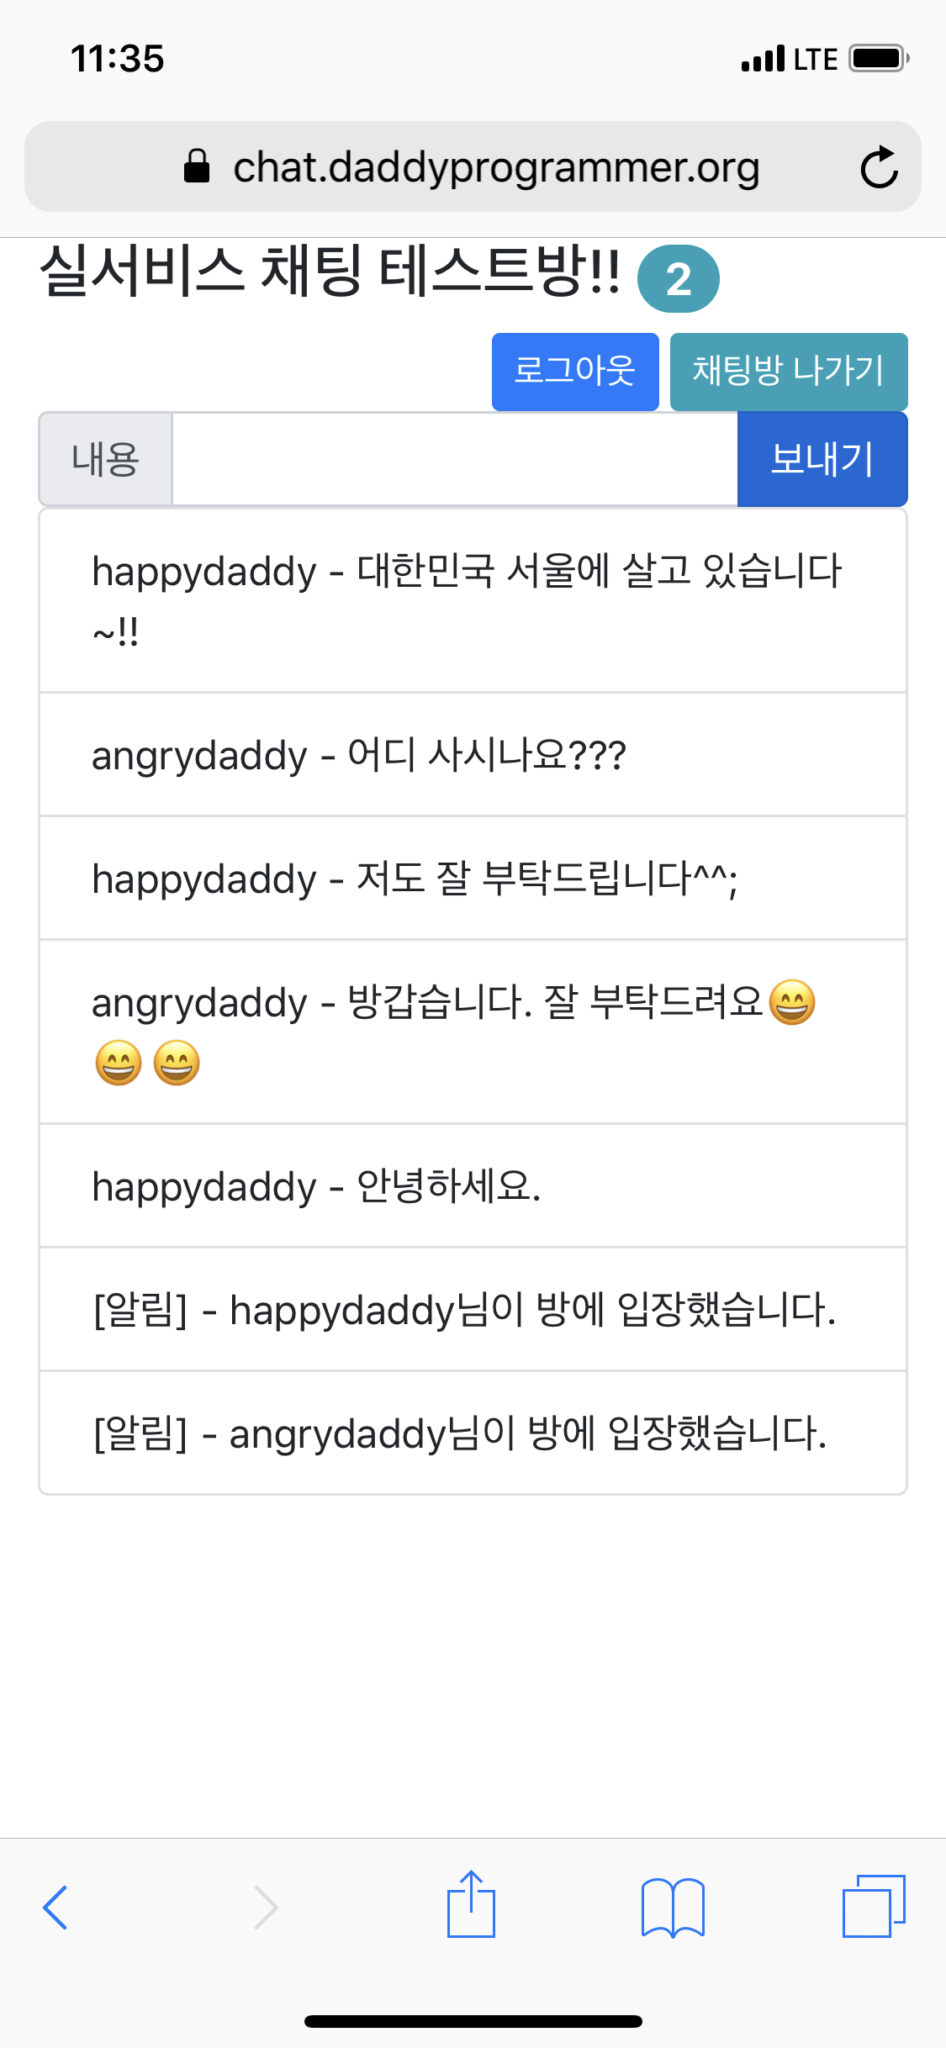
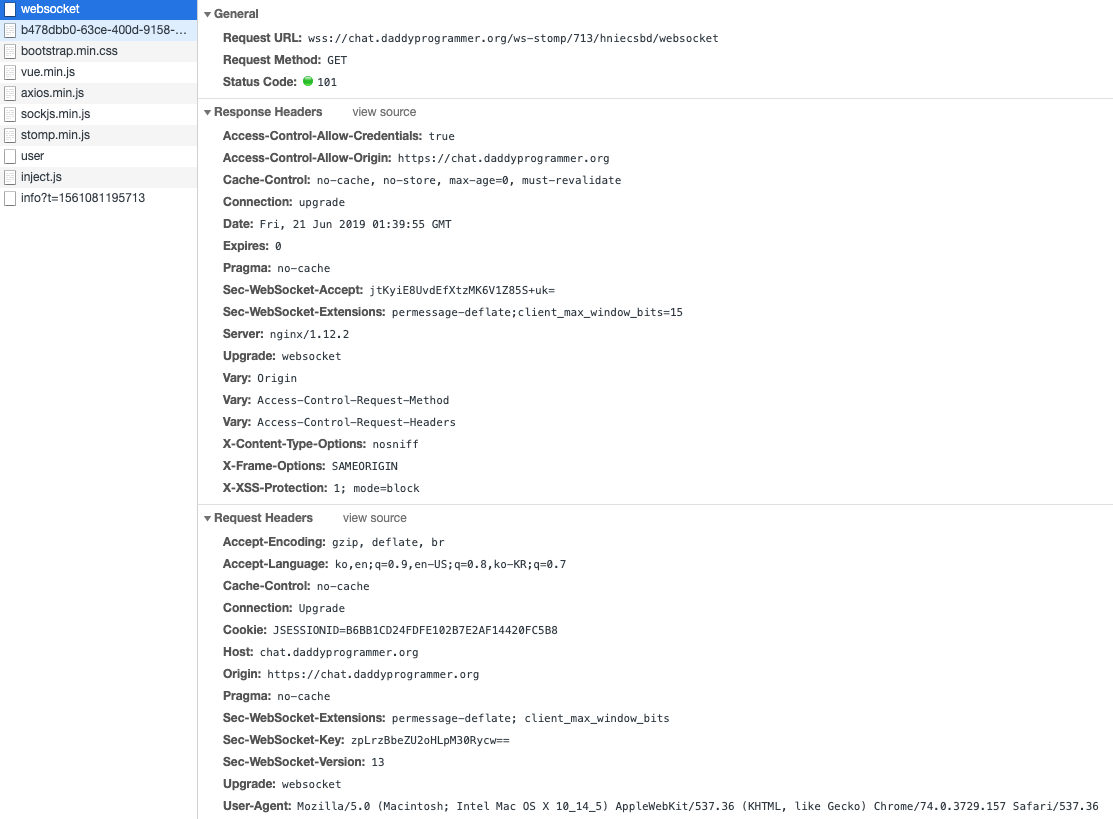
그렇다면 websocket이 wss로 접속되었다는것을 어떻게 알수 있을까요? 브라우저의 Network접속 로그를 보면 다음과 같은 내용을 확인할 수 있습니다. 리퀘스트 URL이 wss로 시작하고 Status Code는 101임을 확인 할수 있습니다.
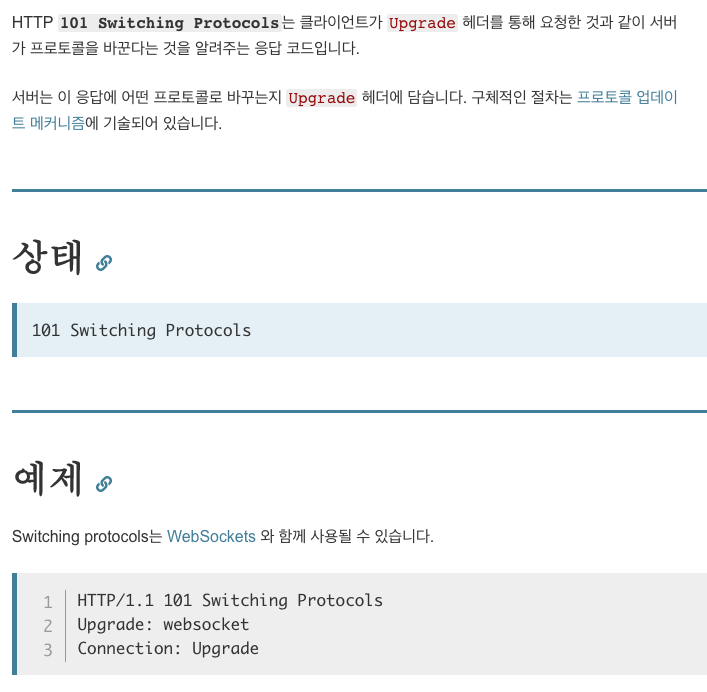
Status Code 101의 의미는 다음과 같습니다. 아래 내용에 따르면 https로 접속은 하되 접속후에 Upgrade를 통해 WSS프로토콜로 변경 한다는 것을 알 수 있습니다.
이번 실습에서는 도메인에 SSL인증서를 적용하여 보안이 적용된 Websocket(WSS)을 구축해 보았습니다. 기능 추가를 통해 안전한 채팅 메시지 교환이 가능하게 되었습니다!!

