- aws lambda 개발하기(1) – 로컬 개발 환경 구축(node.js + serverless)
- aws lambda 개발하기(2) – hellolambda, Gateway 트리거
- aws lambda 개발하기(3) – node package(모듈)설치 및 개발, 환경변수 적용
- aws lambda 개발하기(4) – serverless로 트리거(trigger), 대상(destination), 실행역할(role), VPC, 기본 설정
- aws lambda 개발하기(5) – serverless plugin (offline, prune plugin)
- aws lambda 개발하기(6) – Multi Endpoint Restful api 개발
- aws lambda 개발하기(7) – CircleCI를 이용하여 자동 배포하기
- aws lambda 개발하기(8) – Asynchronous Tasks by SQS(Simple Queue Service)
- aws lambda 개발하기(9) – Lambda Layer 이용하여 배포 사이즈 줄이기
이번시간에는 아주 간단한 lambda를 만들어 보겠습니다. 이전시간에는 로컬에 lambda를 개발하기 위한 환경을 구축하였지만, 사실 브라우저를 통해 aws console에서도 개발이 가능하므로 둘다 진행해 보겠습니다.
aws console에서 lambda 만들기
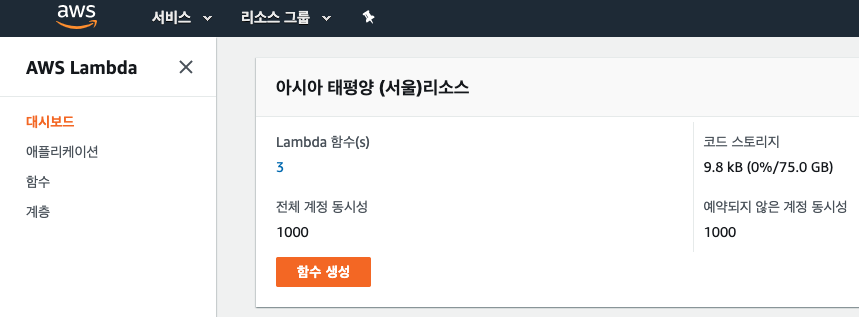
aws lamba 페이지로 이동하여 함수 생성을 클릭합니다.
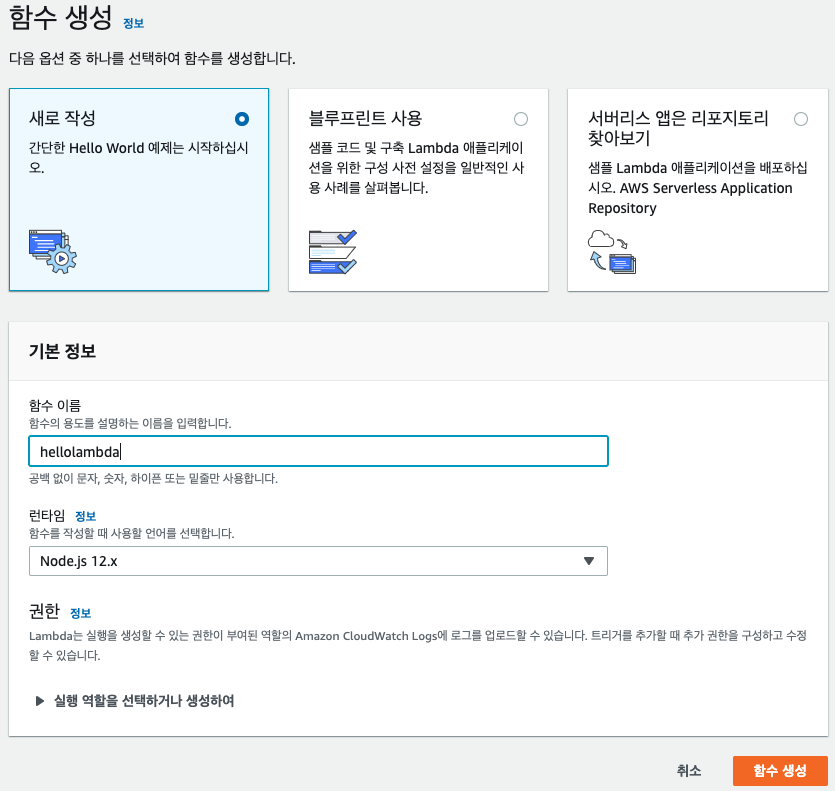
적당한 함수이름을 적고 함수생성을 클릭합니다. 권한에 실행역할을 세팅해야 하는데 세팅하지 않고 생성하면 자동으로 역할이 생성되어 lambda에 적용됩니다.
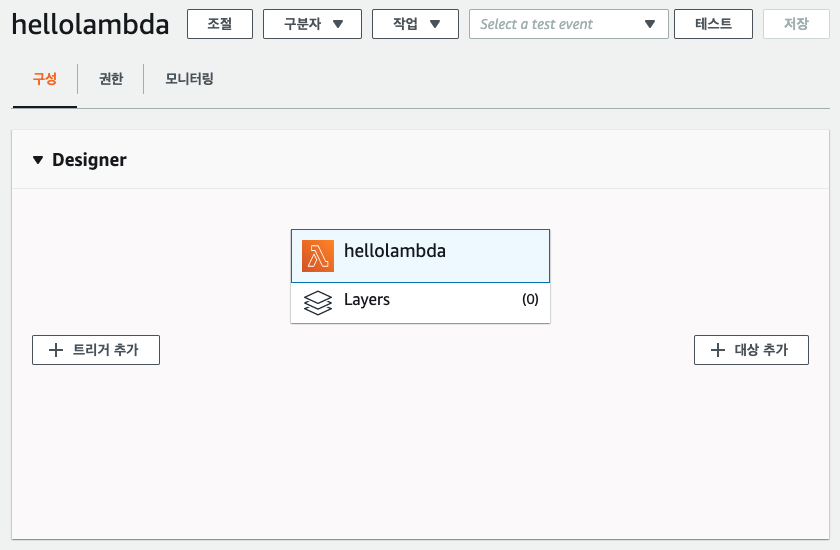
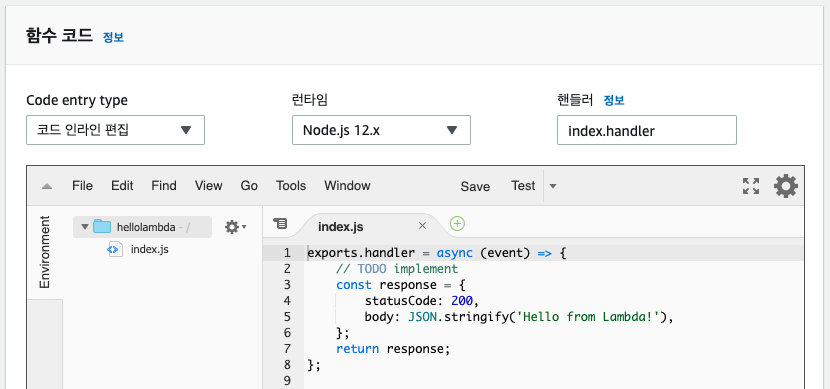
생성이 완료되면 아래와 같이 designer와 함수 코드 부분을 확인할 수 있습니다. 아래부분이 더 있지만 생략하도록 하겠습니다.
트리거를 등록하면 lambda가 특정상황에 실행되도록 할수 있습니다. Api Gateway를 연결하면 특정 url로 들어왔을때 lambda가 요청을 처리하도록 Rest API를 만들수 있습니다.
대상추가에는 lambda 함수에 대상을 추가하여 호출 결과에 따라 추가작업을 진행할 수 있습니다. 예를 들자면 성공시 또다른 람다 함수를 연결하여 추가로 람다를 실행 할수도 있습니다. 그밖에 대상에 SNS, SQS를 추가하여 다른곳에 메시지를 Http나 큐로 전달하는 등의 작업도 가능합니다.
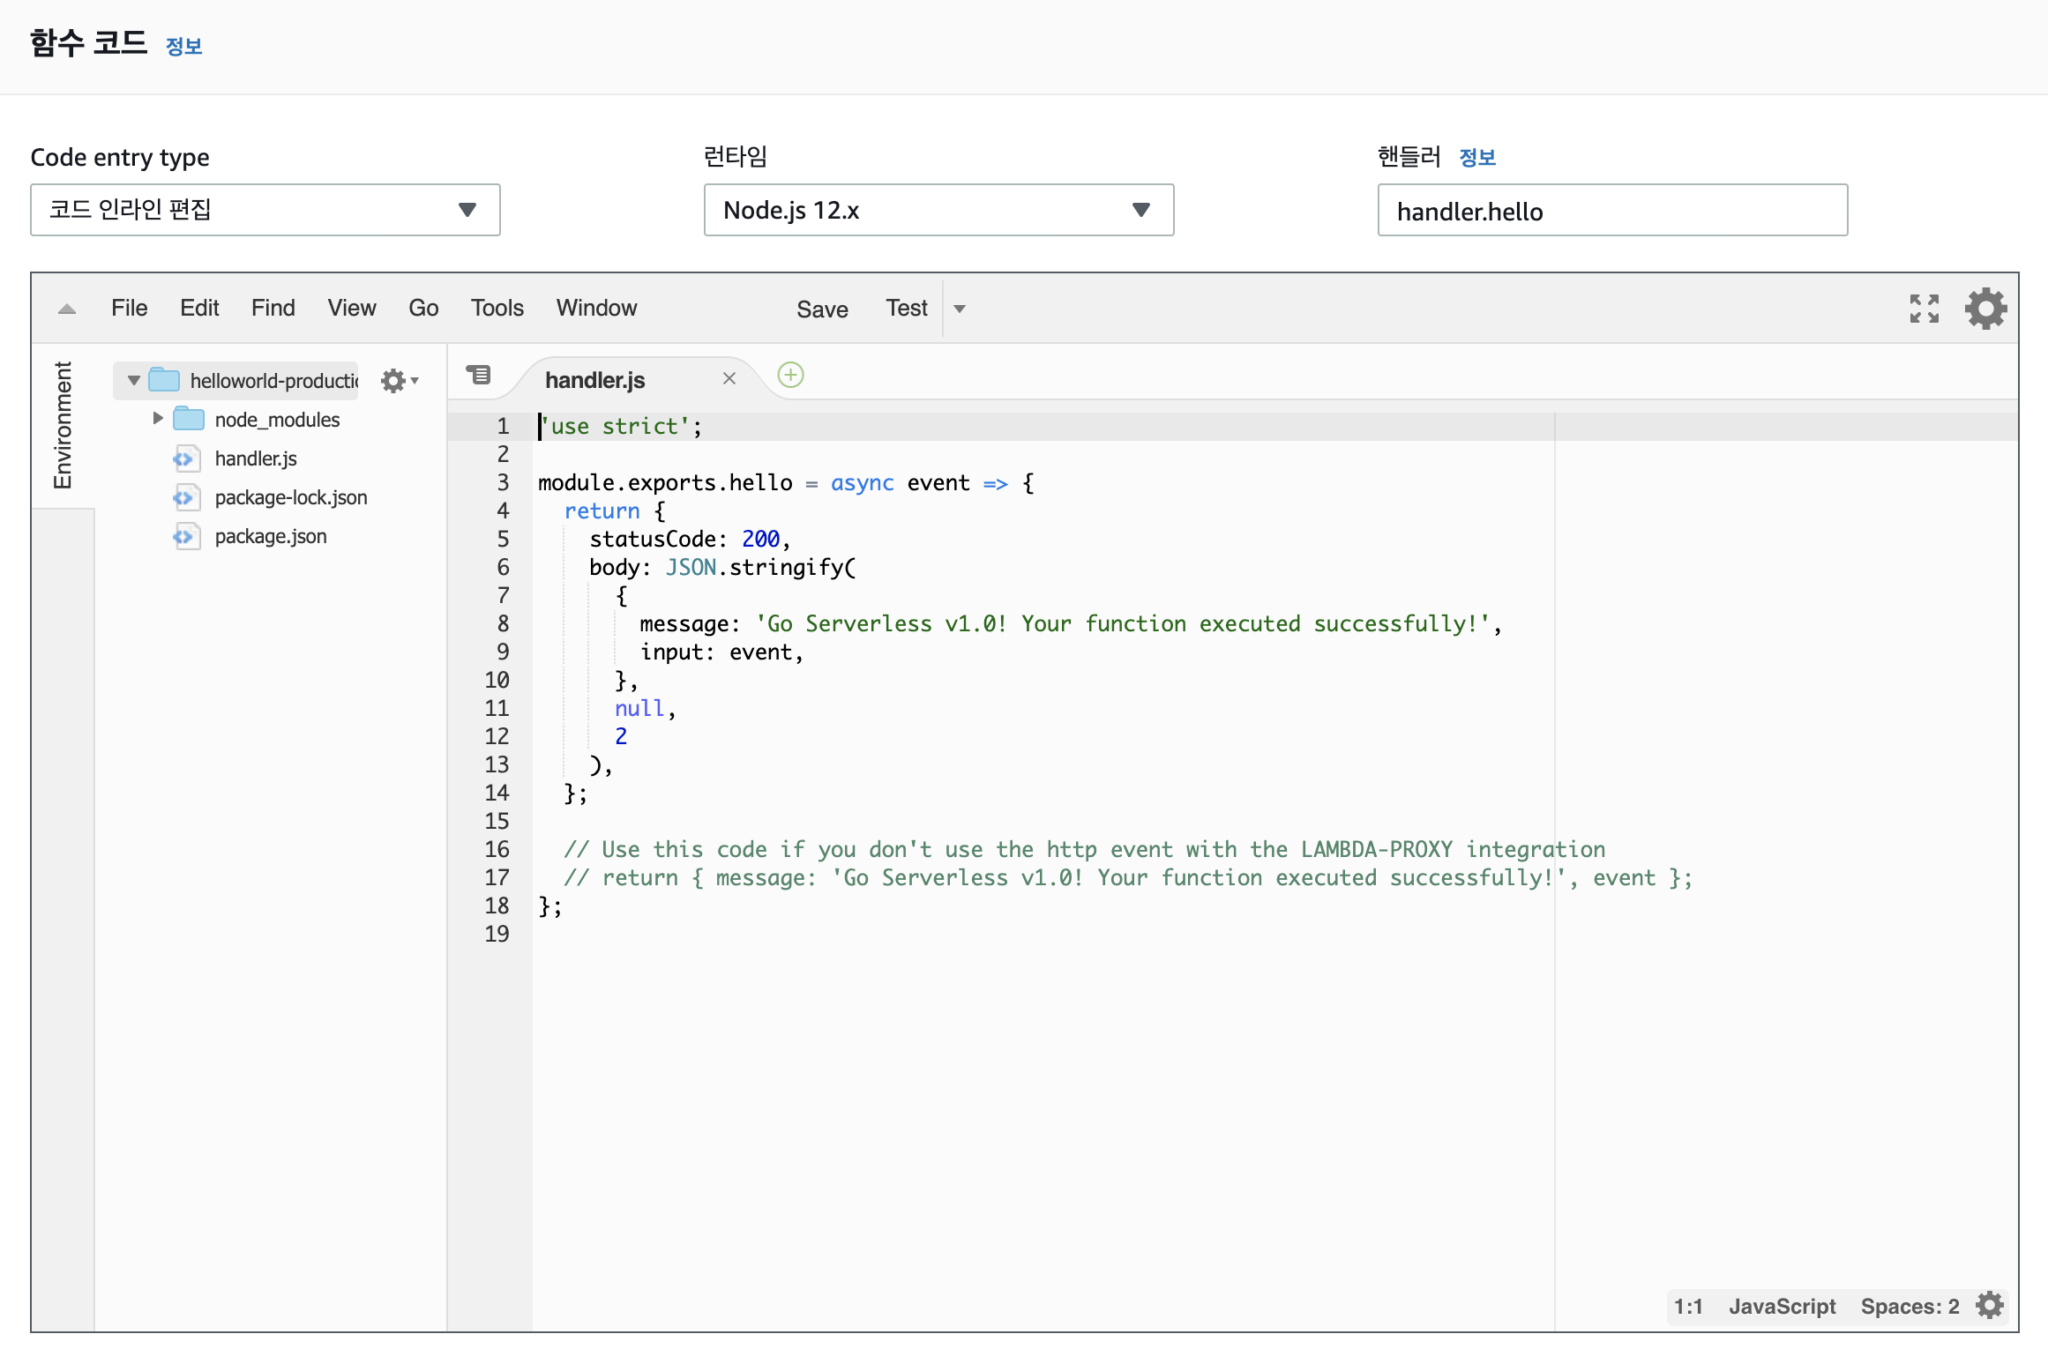
코드 에디터를 제공하므로 온라인에서도 작업이 가능합니다.
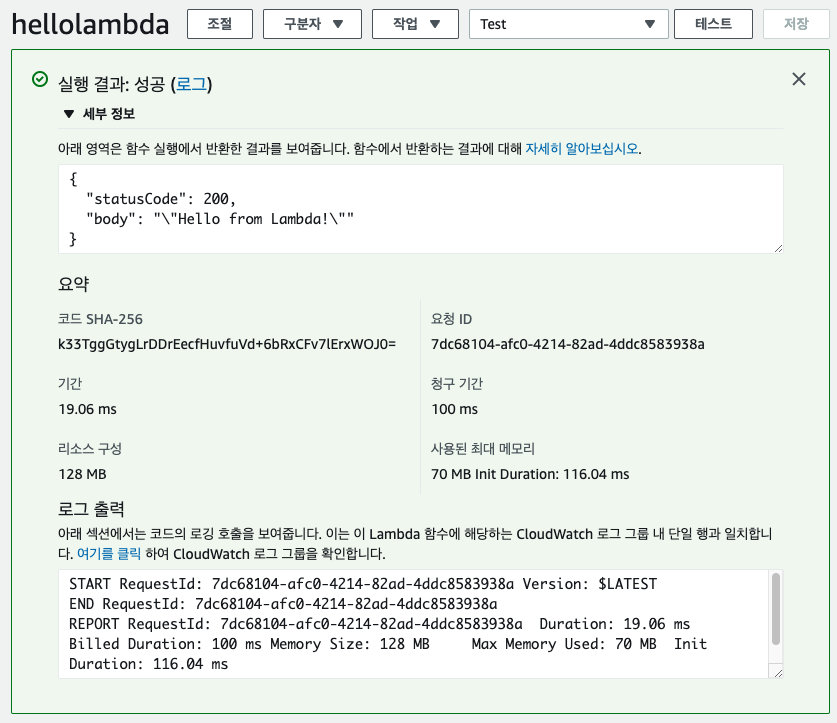
상단의 테스트 버튼을 클릭하면 테스트 데이터로 이벤트를 발생시켜 성공 실패에 대한 세부 정보를 확인할 수 있습니다.
serverless 프레임워크로 lambda 만들기
이전 장에서 환경 구성을 해놓은 상태이므로 serverless 명령어로 프로젝트를 만들어 진행하겠습니다. serverless create 명령으로 프로젝트를 생성할 수 있으며 템플릿 옵션을 적용하면 해당 언어의 기본 코드를 갖춘 프로젝트를 생성할수 있습니다.
현재 버전에서 지원하는 템플릿은 다음과 같습니다. 웬만한 언어는 모두 지원하므로 자신있는 언어의 템플릿을 골라 lambda를 개발하면 됩니다.
aws-clojurescript-gradle
aws-clojure-gradle
aws-nodejs
aws-nodejs-typescript
aws-alexa-typescript
aws-nodejs-ecma-script
aws-python
aws-python3
aws-ruby
aws-provided
aws-kotlin-jvm-maven
aws-kotlin-jvm-gradle
aws-kotlin-nodejs-gradle
aws-groovy-gradle
aws-java-maven
aws-java-gradle
aws-scala-sbt
aws-csharp
aws-fsharp
aws-go
aws-go-dep
aws-go-mod
아래에서는 path옵션을 주어 helloworld 디렉토리를 생성후 aws-nodejs 템플릿으로 프로젝트를 생성하였습니다. service 이름은 helloworld로 합니다.
$ serverless create --template aws-nodejs --path helloworld --name helloworld
축약해서 다음과 같이 호출해도 됩니다.
$ sls create -t aws-nodejs -p helloworld -n helloworld
Serverless: Generating boilerplate...
Serverless: Generating boilerplate in "/Users/abel/project-lambda/helloworld"
 _______                             __
|   _   .-----.----.--.--.-----.----|  .-----.-----.-----.
|   |___|  -__|   _|  |  |  -__|   _|  |  -__|__ --|__ --|
|____   |_____|__|  \___/|_____|__| |__|_____|_____|_____|
|   |   |             The Serverless Application Framework
|       |                           serverless.com, v1.62.0
 -------'

Serverless: Successfully generated boilerplate for template: "aws-nodejs"
생성이 완료되면 다음과 같은 구조로 프로젝트가 생성됩니다.
handler.js에 로직이 들어가고 serverless.yml에는 프로젝트의 세팅정보가 들어갑니다.
└── helloworld
    ├── handler.js
    └── serverless.yml
handler.js
module.exports.hello = async event => { }; 내부에 자동으로 기본코드가 작성됩니다. 해당 부분을 원하는 비즈니스 로직으로 대체하면 됩니다.
'use strict';

module.exports.hello = async event => {
  return {
    statusCode: 200,
    body: JSON.stringify(
      {
        message: 'Go Serverless v1.0! Your function executed successfully!',
        input: event,
      },
      null,
      2
    ),
  };

  // Use this code if you don't use the http event with the LAMBDA-PROXY integration
  // return { message: 'Go Serverless v1.0! Your function executed successfully!', event };
};
serverless.yml
자동으로 생성된 내용중 주석을 제외한 설정은 다음과 같습니다. function 이름은 기본 hello로 생성되므로 변경이 필요하면 아래 functions에서 hello를 다른 이름으로 변경하고 handler.js에서 module.exports.hello의 hello를 다른 이름으로 변경하면 됩니다.
service: helloworld

provider:
  name: aws
  runtime: nodejs12.x

functions:
  hello:
    handler: handler.hello
로컬에서 코드 실행
위의 코드를 로컬에서 테스트해 보기 위해서는 아래와 같이 명령을 실행합니다.
severless invoke [환경명] -f [function명]
$ sls invoke local -f hello
{
    "statusCode": 200,
    "body": "{\n  \"message\": \"Go Serverless v1.0! Your function executed successfully!\",\n  \"input\": \"\"\n}"
}
aws에 프로젝트 배포
serverless deploy 명령으로 원격 aws에 람다를 배포할수 있습니다. –stage에는 배포할 환경을 지정하고 –region에는 배포할 region을 지정합니다. region의 경우는 severless.yml에 설정해주면 생략할 수 있습니다.
$ serverless deploy --stage production --region ap-southeast-1
축약해서 다음과 같이 실행해도 됩니다.
$ sls deploy -s production -r ap-northeast-2
Serverless: Packaging service...
Serverless: Excluding development dependencies...
Serverless: Creating Stack...
Serverless: Checking Stack create progress...
........
Serverless: Stack create finished...
Serverless: Uploading CloudFormation file to S3...
Serverless: Uploading artifacts...
Serverless: Uploading service helloworld-service.zip file to S3 (8.49 MB)...
Serverless: Validating template...
Serverless: Updating Stack...
Serverless: Checking Stack update progress...
...............
Serverless: Stack update finished...
Service Information
service: helloworld-service
stage: production
region: ap-southeast-1
stack: helloworld-service-production
resources: 6
api keys:
  None
endpoints:
  None
functions:
  hello: helloworld-service-production-hello
layers:
  None
Serverless: Run the "serverless" command to setup monitoring, troubleshooting and testing.
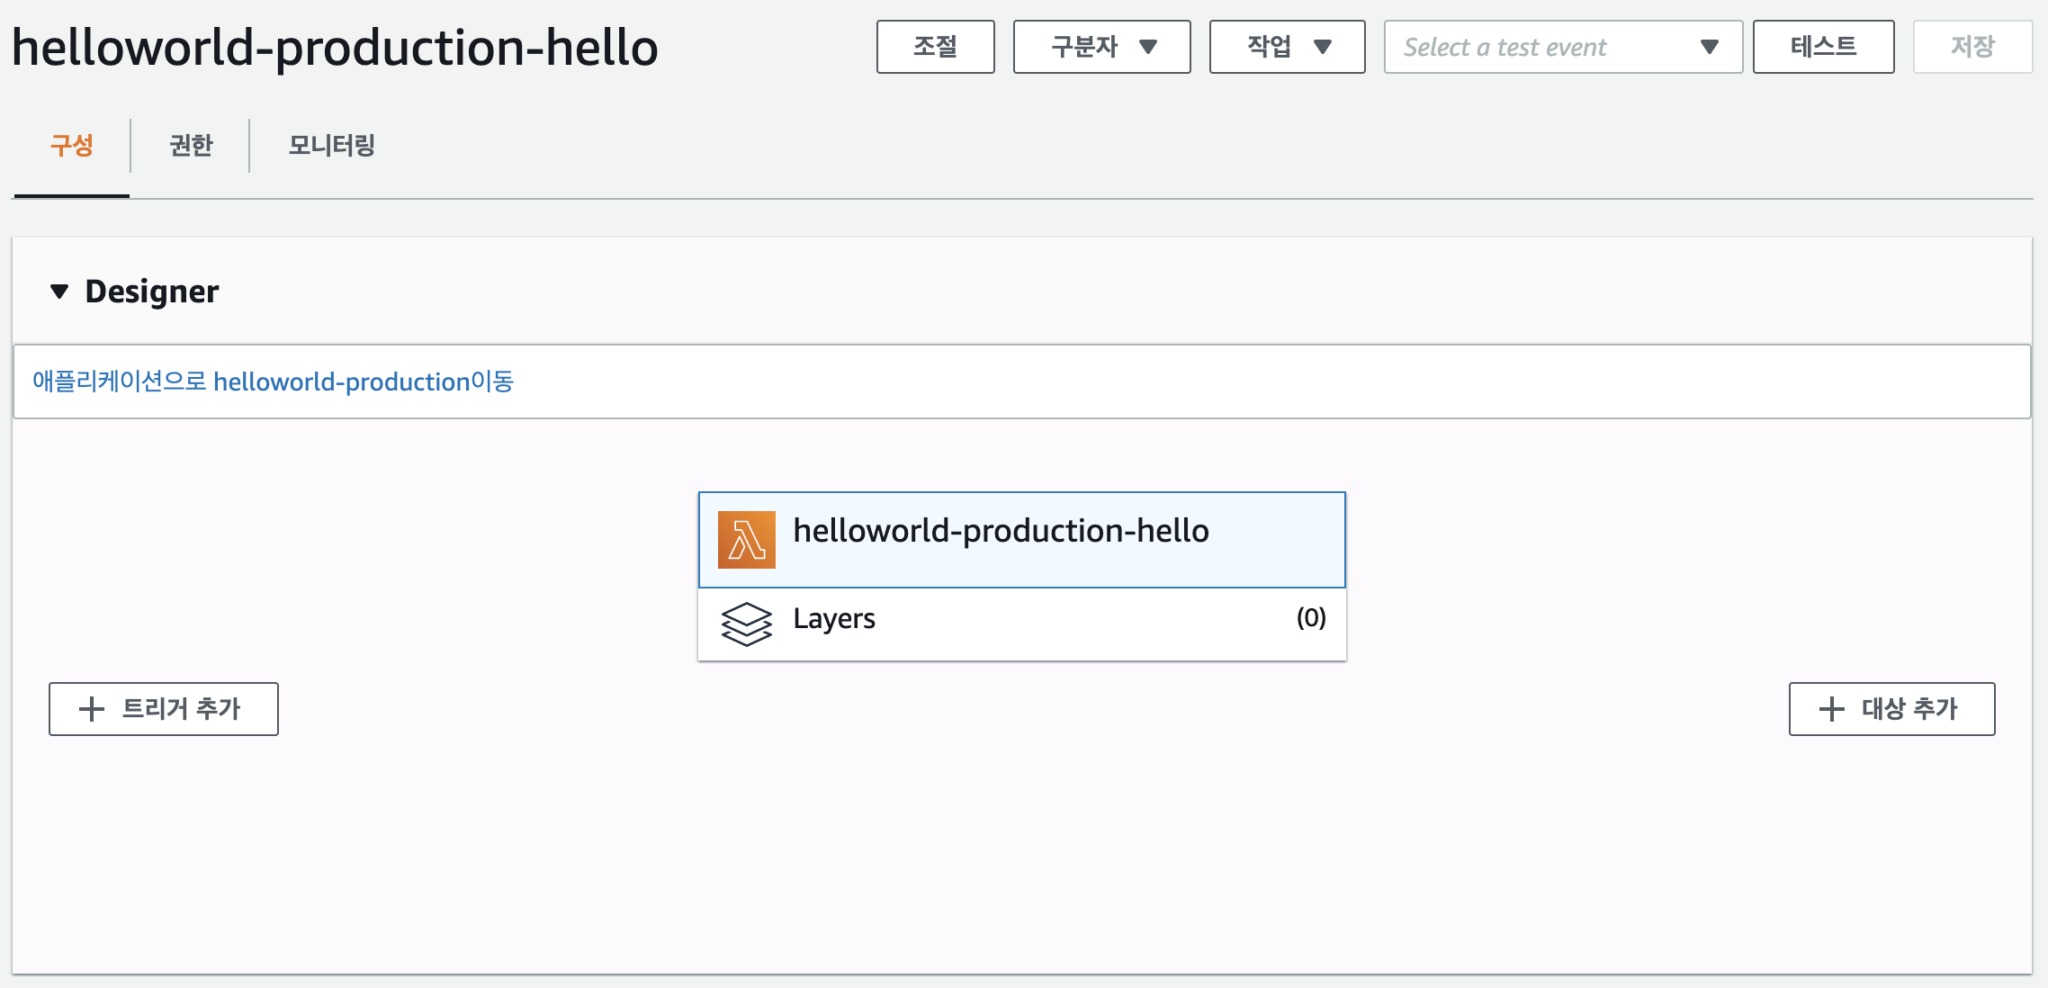
배포 완료후에는 aws lambda 콘솔에서 확인이 가능합니다. 직전에 aws 웹 console을 통해서 생성한것과 동일하게 로컬에서도 서버로 바로 배포가 가능함을 확인할 수 있습니다.

lambda에 트리거로 Gateway 추가하기
트리거라는 말은 발동이라는 의미를 지니고 있습니다. lambda자체는 혼자서는 실행 될 수 없기 때문에 트리거를 걸어줘야 합니다. 여기서는 gateway를 통해 웹 요청이 들어왔을때 lambda가 실행되도록 처리해 보겠습니다.
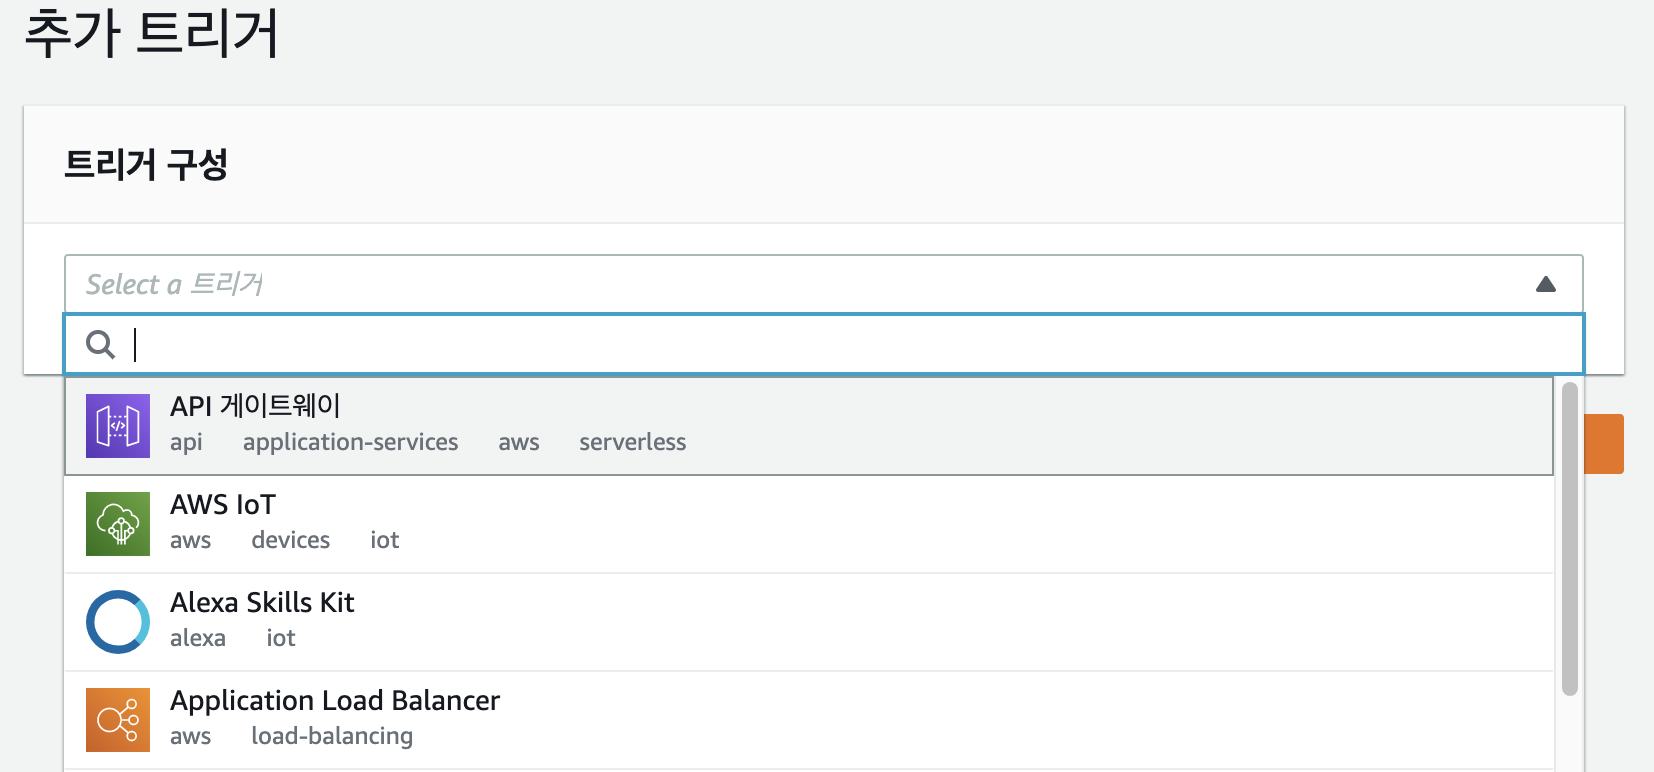
lambda console에서 +트리거를 누르고 API 게이트웨이를 선택합니다.
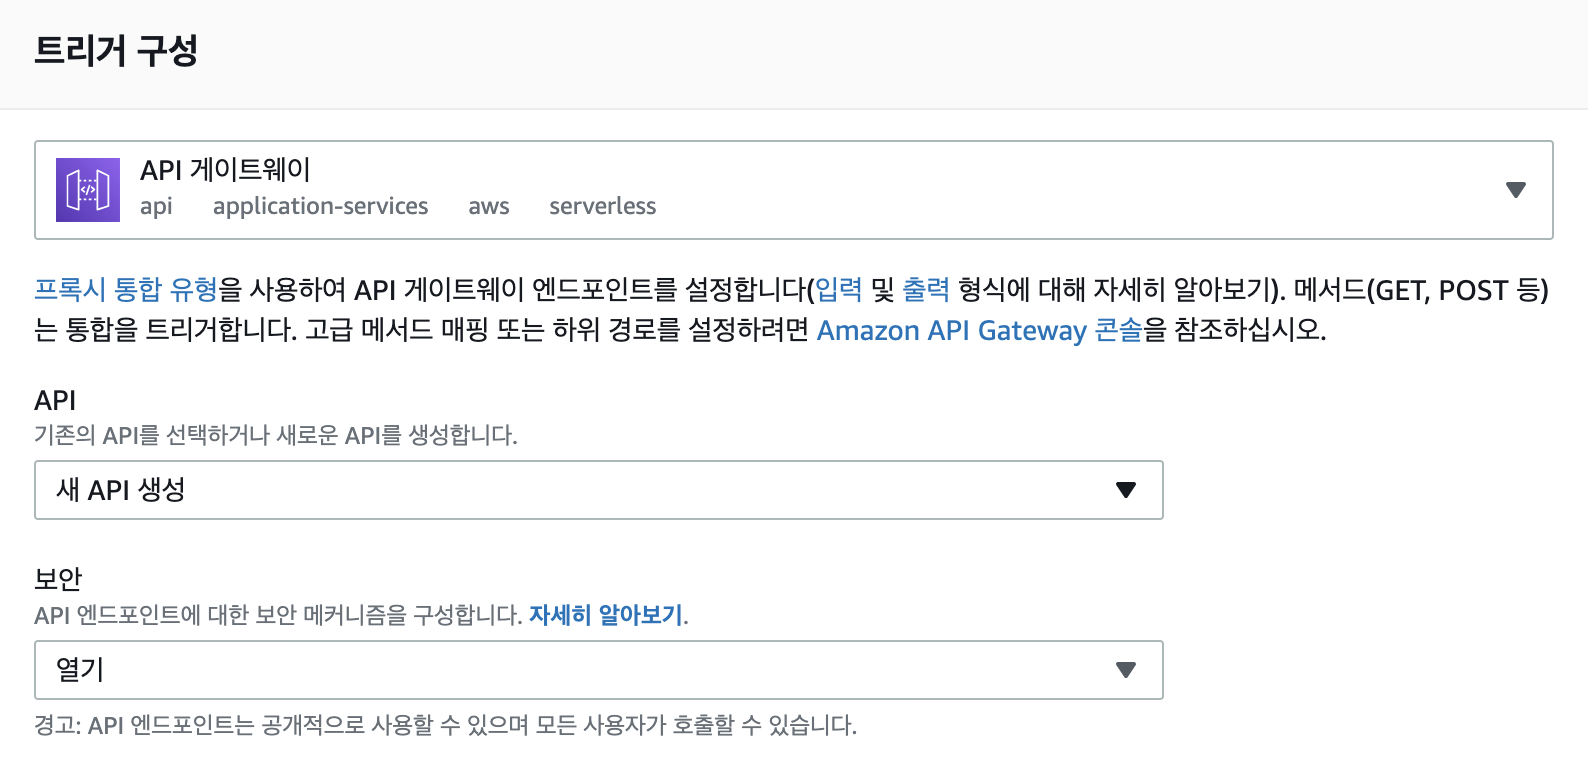
트리거 구성에서 API항목은 신규로 게이트웨이를 생성할경우 새 API생성을 선택하면 됩니다. 기존에 만들어진 API Gateway를 사용하려면 기존 REST API항목에 노출되는 Gateway를 선택하면 됩니다. 여기서는 새 API 생성을 선택합니다.
보안 항목은 테스트기 때문에 아무나 호출 가능하도록 열기를 선택합니다. 추가 세팅의 경우 실습에서는 변경없이 기본값을 사용합니다.
추가를 누르면 간단하게 Gateway의 트리거 작업이 완료됩니다.
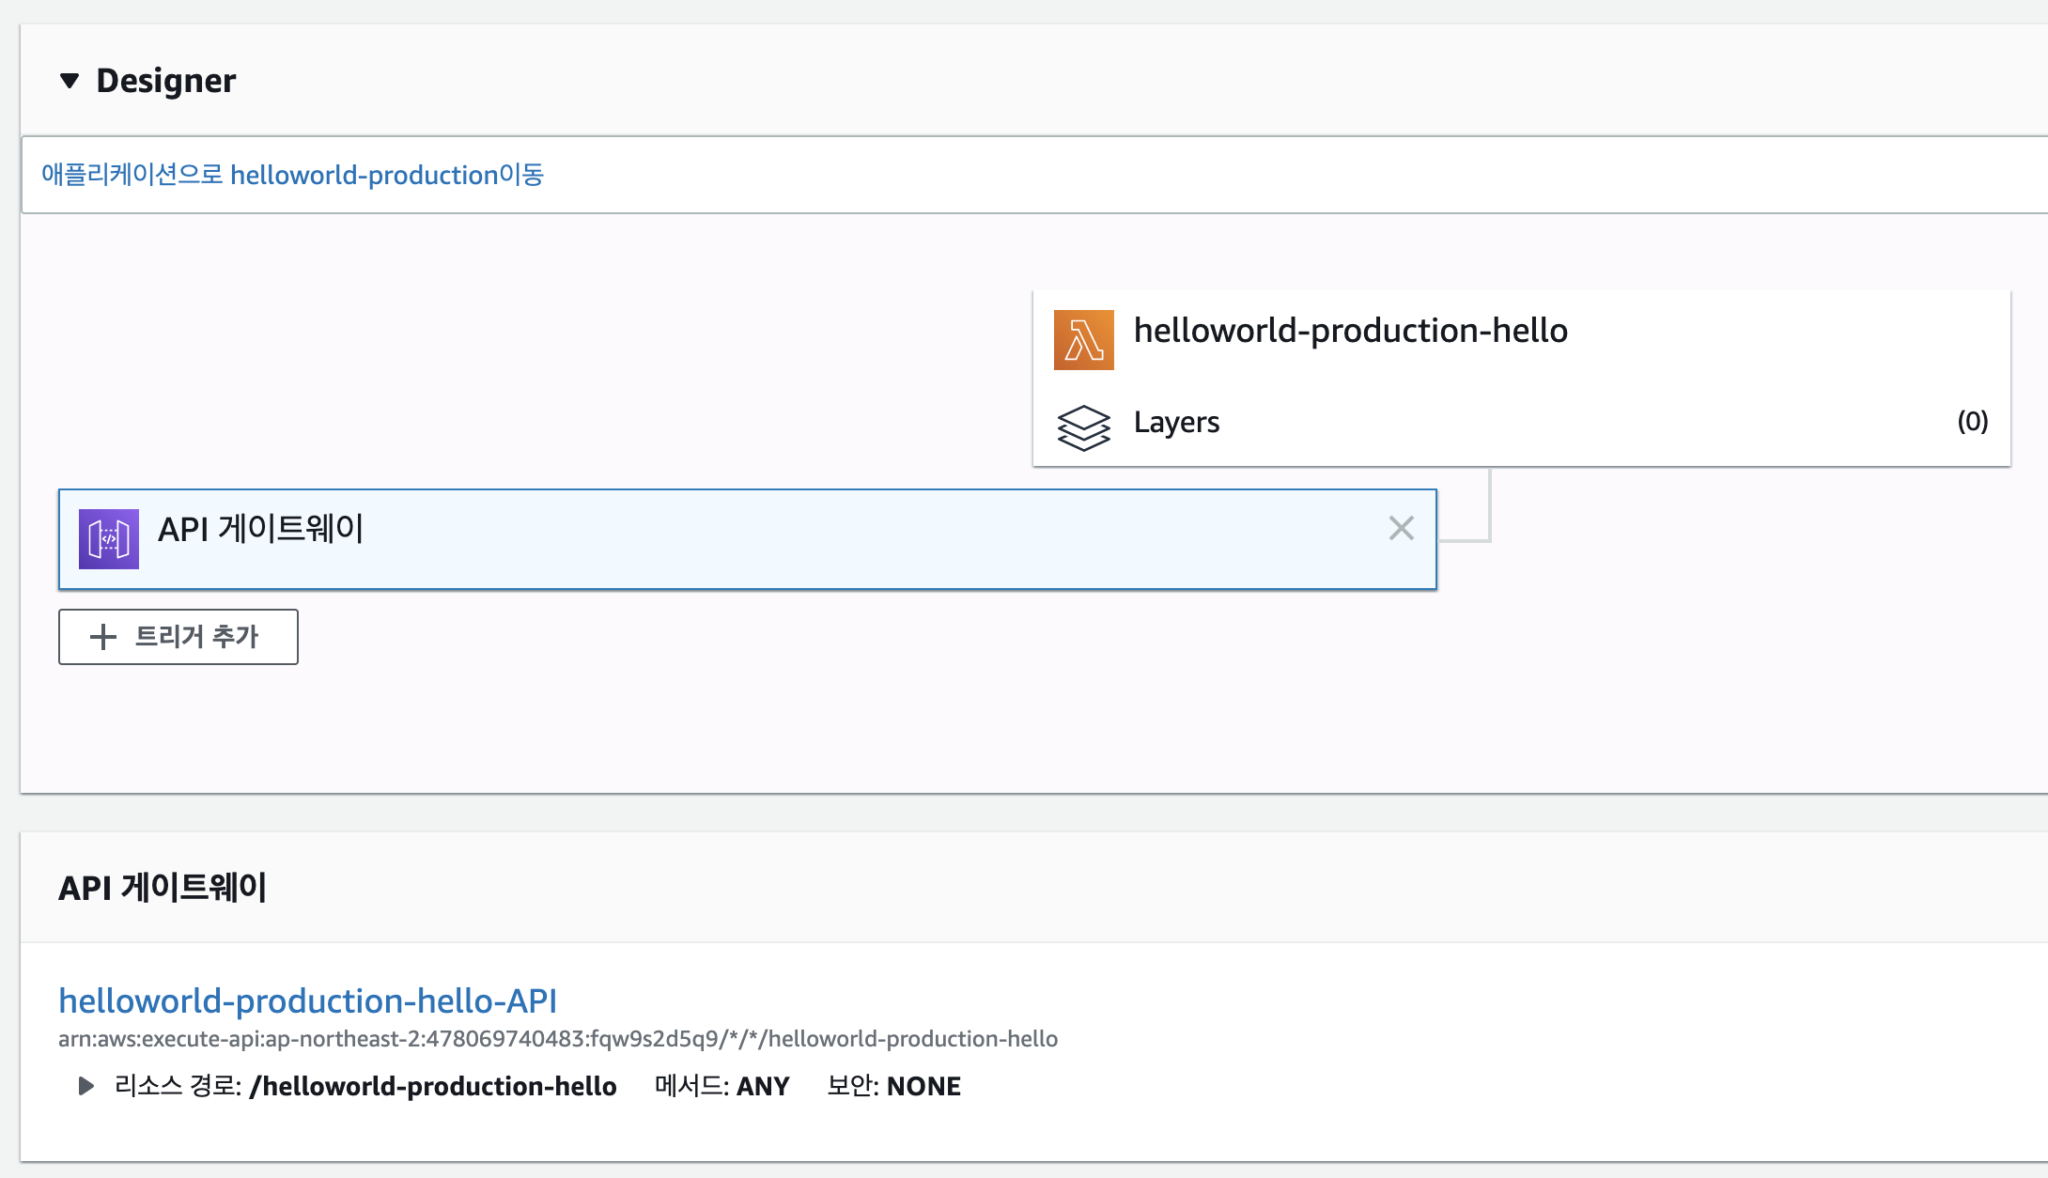
하단의 helloworld-production-hello-API를 클릭하여 Gateway 콘솔로 이동합니다. 좌측 메뉴의 스테이지를 누르고 스테이지 항목중 default를 클릭하면 상세화면 상단에서 Gateway의 공개 URL을 확인할 수 있습니다.

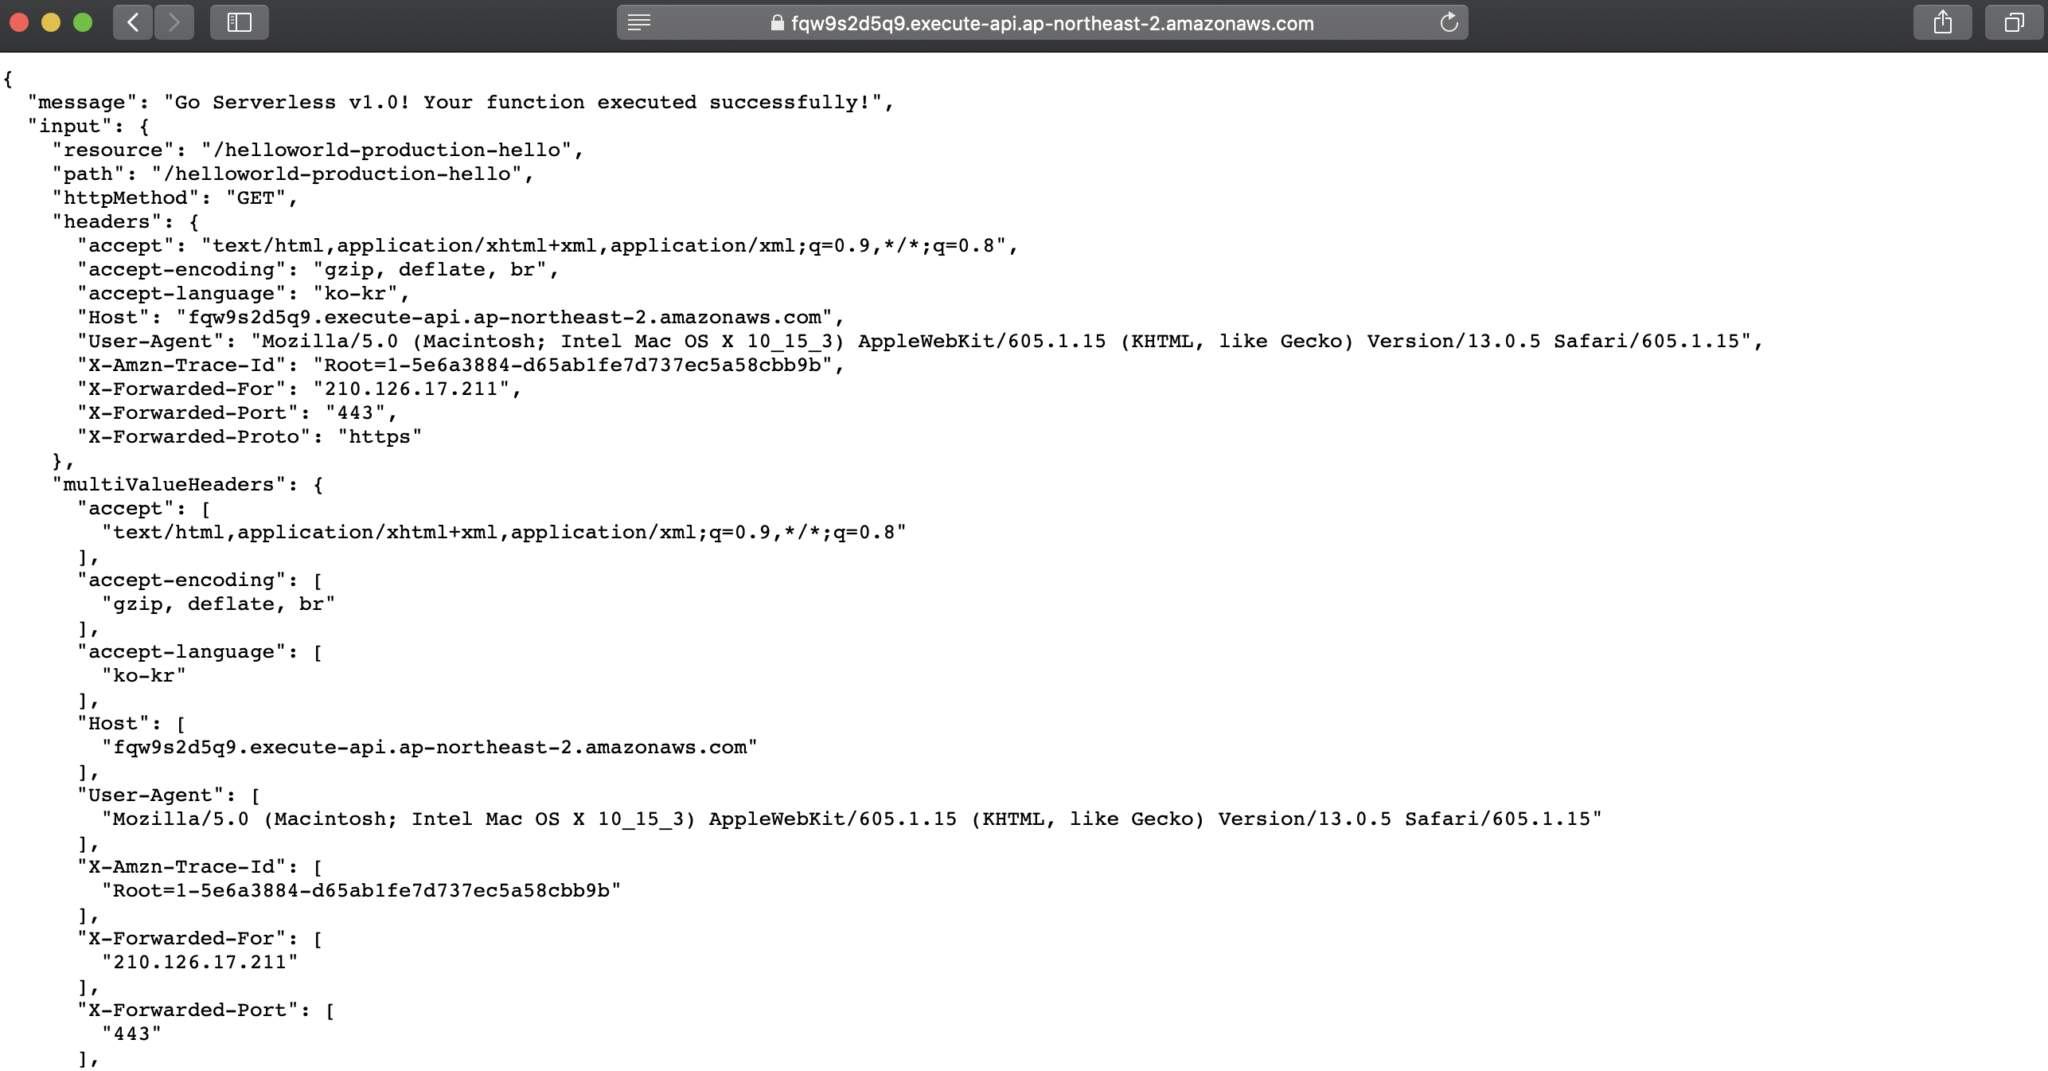
URL뒤에 /helloworld-production-hello를 붙여서 브라우저에서 실행하면 연동된 lambda가 실행되고 결과를 확인할 수 있습니다.
트리거 추가를 serverless에서 설정하기
Gateway트리거 추가는 serverless.yml에 설정을 추가하면 배포후에 반영이 됩니다. functions 아래에 events 내용을 추가하고 배포를 진행합니다. 설정에서는 hello/get path로 gateway가 생성되고 lambda 함수에 트리거로 설정됩니다.
functions:
  hello:
    handler: handler.hello
    events:
      - http:
          path: hello/get
          method: get
배포하면 로그에 endpoints 내용이 남고 해당 URL을 호출하면 lambda가 실행할 수 있습니다.
$ sls deploy -s production -r ap-northeast-2
Serverless: Stack update finished...
Service Information
service: helloworld
stage: production
region: ap-northeast-2
stack: helloworld-production
resources: 12
api keys:
  None
endpoints:
  GET - https://udgrtfgbnjn6.execute-api.ap-northeast-2.amazonaws.com/production/hello/get
functions:
  hello: helloworld-production-hello
layers:
  None
Serverless: Run the "serverless" command to setup monitoring, troubleshooting and testing.
Gateway 콘솔에서도 serverless설정대로 Gateway가 생성된것을 확인 할 수 있습니다.

여기까지 hellolambda 실습을 진행하였고 간단하게 lambda가 무엇인지 맛보았습니다. 다음장에서는 좀더 세부적으로 lambda 함수를 작성하고 세팅하는 실습을 진행해 보겠습니다.
실습 코드 GitHub 주소
https://github.com/codej99/SeverlessAwsLambda

